The Best Cheesy Garlic Chicken Wraps
Some recipes are good, and some are life-saving. This Cheesy Garlic Chicken Wraps Recipe falls into the latter category. If you’ve ever had a chaotic weeknight where dinner felt impossible, you know what I mean. This wrap is crispy, cheesy, and garlicky—basically everything comfort food dreams are made of.

Check out this similar cheesy recipe!
The Magic Behind These Chicken Garlic Wraps
There’s something about golden, garlicky chicken, gooey melted cheese, and crispy tortillas that makes people lose their minds. My kids cheer when they see me pulling out the ingredients. The secret? The combination of bold seasonings, a creamy garlic sauce, and the perfect toasting technique that seals everything in.
What You Need to Make This Cheesy Garlic Chicken Wraps Recipe
Chicken:
- 2 large chicken breasts, diced
- 1 tsp garlic powder
- ½ tsp onion powder
- ½ tsp smoked paprika
- Salt & black pepper to taste
Wraps:
- 4 large flour tortillas
- 1 cup shredded sharp cheddar cheese
- 1 cup shredded mozzarella cheese
Garlic Sauce:
- ½ cup mayonnaise
- 1 tbsp minced garlic
- 1 tsp lemon juice
- ½ tsp honey (optional)
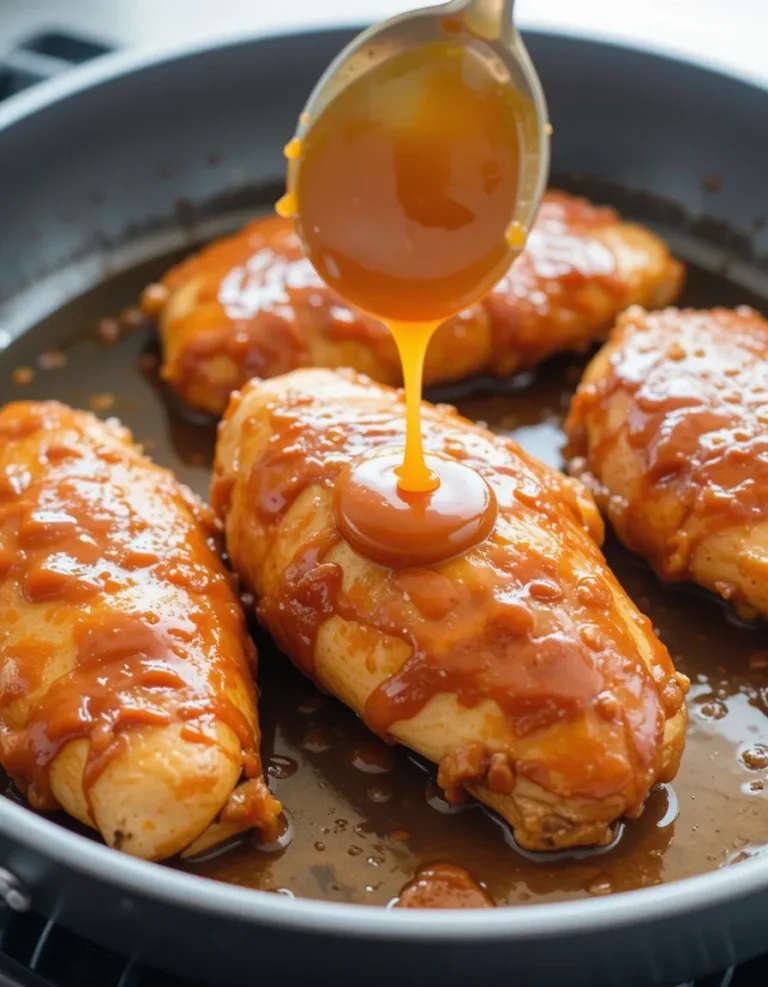
Step 1: Cooking the Chicken to Golden Perfection
The first rule of a great Garlic Chicken Wrap Recipe? Never rush the chicken! Dice it evenly, season generously, and cook in a hot skillet. Let it sizzle undisturbed to get those flavorful, crispy edges. Trust me—those little golden bits are where all the magic happens.

Step 2: Making the Dreamy Garlic Sauce
This creamy garlic sauce is what elevates this Chicken Cheese Wrap from “meh” to “WOW.” It’s rich, garlicky, and just tangy enough to balance out all that melty cheese. Mix mayo, minced garlic, lemon juice, and a hint of honey for a perfect drizzle. Bonus tip? Make extra. You’ll want to dip everything in it.
Want more cheesy dinner ideas? Try these Cheesy Taco Sticks!

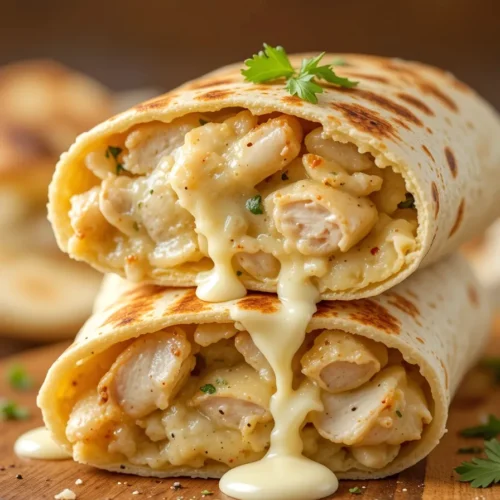
Step 3: Assembling the Ultimate Cheesy Chicken Garlic Wrap
There’s a strategy to this—layering matters. First, spread a good amount of garlic sauce on the tortilla. Then, add the golden, garlicky chicken, followed by a generous pile of cheese. The order ensures even melting and maximum flavor in every bite.

Step 4: Toasting for the Perfect Crunch
Now, here’s where the magic happens. Heat a pan over medium and toast the wraps seam-side down first to seal them. Flip and toast until golden brown and crispy. That slight crunch when you bite into it? That’s the sound of pure happiness.
Serving These Cheesy Chicken Wraps Like a Pro
Slice diagonally for that restaurant-style feel (and let’s be honest, it just looks cooler). Pair it with crispy fries, a fresh salad, or even a cozy bowl of soup. Personally, I like mine with extra garlic sauce for dipping—because there’s no such thing as too much garlic.
For another comforting meal, try this Cheesy Chicken Casserole!
How to Store & Reheat Your Cheesy Chicken Wraps
These wraps are best fresh, but they store surprisingly well. Wrap them tightly in foil and refrigerate for up to three days. When reheating, avoid the microwave—it makes them soggy. Instead, warm them in a skillet or air fryer for that crisp factor.
Ways to Customize This Chicken Garlic Wrap Recipe
- Switch up the cheese: Try pepper jack for a little heat or Monterey Jack for a milder option.
- Add some crunch: Toss in shredded lettuce or sliced bell peppers.
- Make it spicy: Add a drizzle of hot sauce or sprinkle some red pepper flakes.
- Go low-carb: Swap the tortilla for a lettuce wrap or serve it as a bowl with rice.
Make It Healthier Without Losing the Flavor
Want to make these Cheesy Chicken Wraps Recipes a bit lighter? Use whole wheat tortillas, swap mayo for Greek yogurt in the sauce, and add more veggies. You’ll still get that cheesy, garlicky goodness—just with a little less guilt.
Looking for another delicious and hearty meal? Try this cheesy hashbrown casserole!

Frequently Asked Questions About Cheesy Garlic Chicken Wraps Recipe
Can I make these ahead of time?
Absolutely! Cook the chicken and prep the sauce in advance. When you’re ready, assemble and toast for fresh, melty perfection.
What’s the best cheese for this wrap?
A mix of cheddar and mozzarella gives you sharpness and that perfect stretch. But honestly, any good melting cheese works!
How do I keep the wraps from falling apart?
Don’t overfill, fold tightly, and toast with the seam-side down first to seal everything in place.
Can I use a different protein?
Yes! Try shredded rotisserie chicken, shrimp, or even tofu for a vegetarian twist.
What sides go best with this?
French fries, coleslaw, a fresh salad, or even a bowl of tomato soup pair beautifully with these wraps.
Why You Need These Cheesy Garlic Chicken Wraps in Your Life
This Cheesy Garlic Chicken Wraps Recipe isn’t just food—it’s a lifesaver. It’s perfect for those nights when you need something quick but ridiculously satisfying. Kids who only eat melted cheese and chicken will love it. And adults? They deserve a crispy, cheesy bite of happiness after a long day.
Try it once, and I guarantee it’ll be on your dinner rotation for life. And if you’re like me, you’ll probably start putting that garlic sauce on everything. You’ve been warned.
Cheesy Garlic Chicken Wraps Recipe
Ingredients
- For the Chicken:
- 2 large chicken breasts diced
- 1 tsp garlic powder
- ½ tsp onion powder
- ½ tsp smoked paprika
- ½ tsp salt
- ¼ tsp black pepper
- 1 tbsp olive oil
- For the Wraps:
- 4 large flour tortillas
- 1 cup shredded sharp cheddar cheese
- 1 cup shredded mozzarella cheese
- For the Garlic Sauce:
- ½ cup mayonnaise
- 1 tbsp minced garlic
- 1 tsp lemon juice
- ½ tsp honey optional
Instructions
- Prepare the Chicken: In a bowl, season diced chicken with garlic powder, onion powder, smoked paprika, salt, and black pepper.
- Cook the Chicken: Heat olive oil in a skillet over medium heat. Add chicken and cook for 5-7 minutes until golden and cooked through.
- Make the Garlic Sauce: In a small bowl, mix mayo, minced garlic, lemon juice, and honey (if using). Stir well and set aside.
- Assemble the Wraps: Spread garlic sauce on each tortilla, then add cooked chicken and a generous amount of cheese.
- Toast the Wraps: Heat a dry pan over medium heat. Place each wrap seam-side down first, toast for 2-3 minutes per side until golden and crispy.
- Serve & Enjoy: Slice diagonally and serve hot with extra sauce or your favorite side dishes!
Notes
- For extra crunch, add shredded lettuce or diced bell peppers.
- Swap cheddar for pepper jack if you like a spicy kick.
- These wraps reheat best in a skillet or air fryer for crispiness.
- Try whole wheat or gluten-free tortillas for a healthier twist.