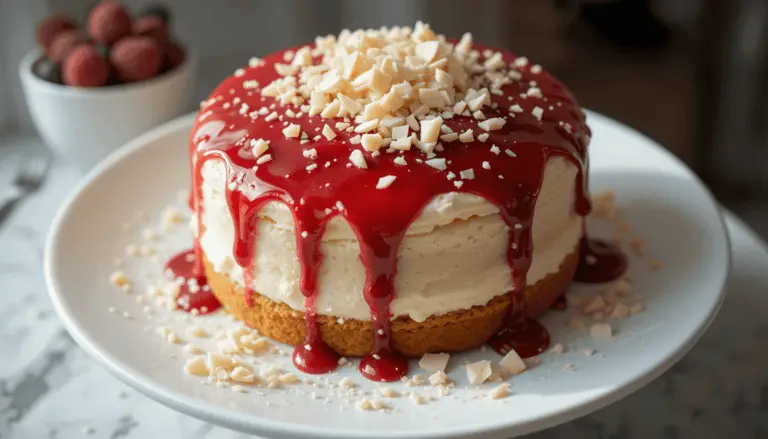
Red Velvet Cheesecake Recipe
Red velvet cheesecake: even the name sounds like a decadent dream, doesn’t it? This dessert combines the moist, slightly tangy allure of red velvet cake with the creamy, rich perfection of cheesecake. It’s the ultimate indulgence, the kind of treat that turns a casual dessert moment into a memorable occasion. Whether you’re recreating the Cheesecake Factory’s masterpiece or baking it from scratch, this red velvet cheesecake recipe is bound to become your go-to for special occasions—or just because you deserve it.

If you’re as much of a dessert enthusiast as I am, you’ll also want to try this tropical Hawaiian Pineapple Cake or a refreshing Raspberry Lemon Cake for your next sweet treat adventure.
What Makes Red Velvet Cheesecake So Special?
The Perfect Marriage of Cake and Cheesecake
Moist Red Velvet Cake Meets Creamy Cheesecake
Imagine slicing into a dessert where fluffy, tender red velvet cake cradles a velvety, creamy cheesecake. It’s not just a dessert—it’s an experience. The tangy undertones of the red velvet balance the sweetness of the cheesecake, creating a pairing so perfect you might just hear angels singing as you take your first bite.
A Dessert That Appeals to All Your Senses
The vibrant red hue, the silky texture, the heavenly aroma of cream cheese frosting—this cake doesn’t just taste amazing; it’s a feast for the eyes and nose, too. It’s a showstopper for celebrations and a soul-soother for cozy nights in.
Inspired by the Cheesecake Factory’s Famous Recipe
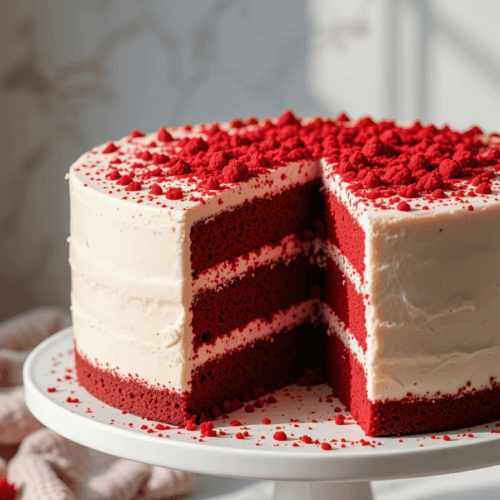
A Luxurious Four-Layered Dessert
The Cheesecake Factory’s version of red velvet cheesecake is legendary: two layers of creamy cheesecake sandwiched between rich red velvet cake, all smothered in luscious cream cheese frosting. If that doesn’t make your mouth water, I don’t know what will.
How This Homemade Version Stands Out
While the restaurant’s version is iconic, making it at home adds a personal touch—and no waiting in line! Plus, you can tweak this red velvet cheesecake recipe to match your flavor preferences. Want a little extra cream cheese frosting? Go for it. Feeling bold? Add some shaved chocolate on top.

Key Ingredients for a Perfect Red Velvet Cheesecake
The Cheesecake Layer: Secrets to a Creamy Texture
Why Full-Fat Cream Cheese is Non-Negotiable
When it comes to cheesecake, shortcuts won’t cut it. Full-fat cream cheese is the key to a rich, silky cheesecake layer. Low-fat versions just don’t deliver that creamy magic we’re looking for.
The Role of Heavy Cream for Silkiness
Heavy cream adds moisture and a luxurious texture to the cheesecake. Don’t skimp here; it’s what makes each bite melt in your mouth. If you’re out of heavy cream, whole milk or half-and-half can work in a pinch—but they won’t hit the same notes.
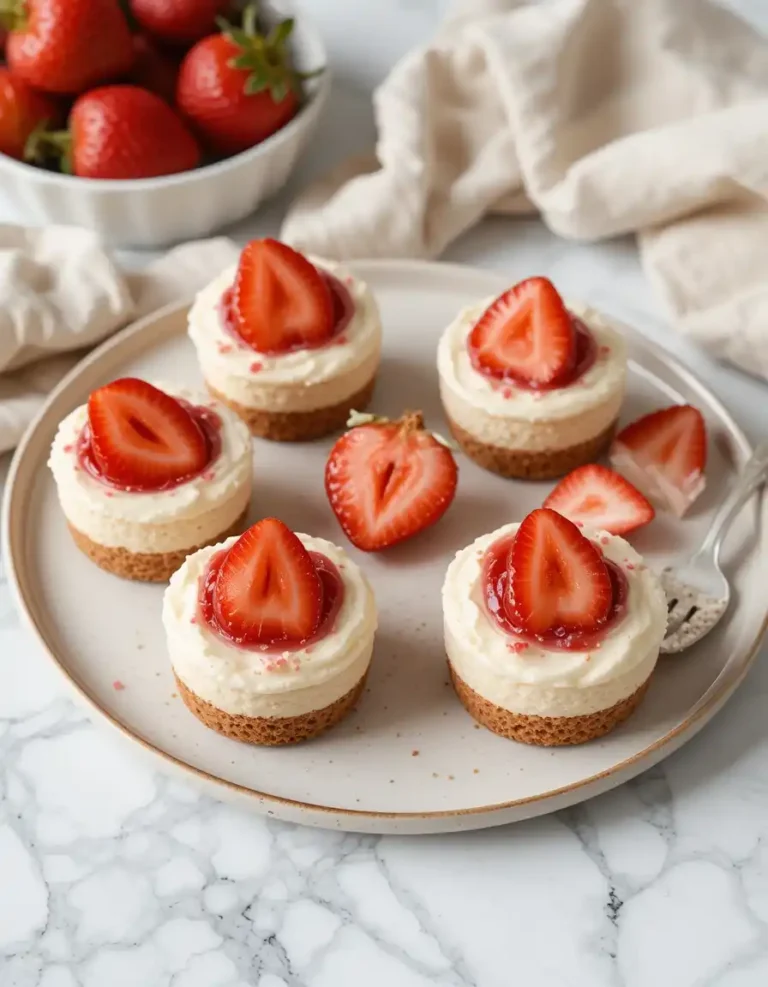
Looking for a similar creamy indulgence? Try these Raspberry Muffins with Cream Cheese for a delightful breakfast or dessert idea.
The Red Velvet Cake Layers: Essential Ingredients
Cocoa Powder and Its Subtle Flavor Boost
Red velvet isn’t just a chocolate cake dyed red. It has a mild cocoa flavor, thanks to unsweetened natural cocoa powder. This ingredient adds depth without overpowering the tangy buttermilk notes.
The Chemistry of Buttermilk, Vinegar, and Baking Soda
These three are the power trio of red velvet cake. The buttermilk keeps the cake moist and tender, while the vinegar reacts with the baking soda to create that airy, melt-in-your-mouth texture.
Red Food Coloring for That Vibrant Signature Hue
Let’s face it, a pale red velvet cake just doesn’t cut it. Liquid or gel food coloring brings that eye-catching, deep red hue that makes this dessert so irresistible.

Step-by-Step Guide to Crafting Red Velvet Cheesecake
Preparing the Cheesecake Layer
Tools You’ll Need for a Smooth Cheesecake Base
A 9-inch springform pan is a must for this recipe. Line the bottom with parchment paper to avoid sticking, and invest in a hand or stand mixer for that silky batter consistency.
Tips for Mixing a Lump-Free Batter
Ensure your cream cheese is at room temperature before mixing—it’s the secret to avoiding lumps. Beat the cream cheese and sugar first, then gradually add the eggs, one at a time.
Baking and Cooling for Perfect Texture
Bake the cheesecake at a low temperature and resist the urge to open the oven door! Once baked, cool it at room temperature for an hour before chilling in the fridge overnight.

While your cheesecake cools, whip up another crowd-pleaser like this Chocolate Lava Cake for a gooey, chocolate-filled treat.
Making the Red Velvet Cake Layers
Preparing the Cake Batter: Common Mistakes to Avoid
Mixing too much = disaster. Overmixing can make your cake dense and dry, so mix just until combined.
How to Achieve a Tender, Moist Cake Every Time
The key is not to overbake. Check for doneness by inserting a toothpick—it should come out with a few moist crumbs, not wet batter.

Creating the Cream Cheese Frosting
How to Get the Ideal Frosting Consistency
Use softened butter and cream cheese for easy mixing. Add powdered sugar gradually to avoid a frosting sugar storm in your kitchen (you’re welcome).
Mixing Techniques for a Smooth, Lump-Free Finish
Beat the frosting on medium speed until creamy. Scrape down the sides of your bowl frequently to ensure no sneaky lumps are hiding.

Assembling the Perfect Red Velvet Cheesecake
Layering the Cheesecake and Cake
Leveling the Cake Layers for a Seamless Stack
Use a serrated knife to level your cake layers if they’re uneven. A steady hand (or a lazy Susan) works wonders here.
Aligning the Layers for a Professional Look
Place the first cake layer on your platter, add the cheesecake, then top it with the second cake layer. Chill between layers to keep everything firm and stable.
Frosting and Decorating Your Cheesecake
Techniques for Even Frosting Coverage
Start with a crumb coat—a thin layer of frosting to lock in crumbs. Chill the cake for 15 minutes, then apply a thicker layer for that smooth finish.
Creative Decoration Ideas for a Show-Stopping Dessert
- Sprinkle red velvet cake crumbs on the sides or top.
- Add shaved white chocolate for a sophisticated touch.
- Use a piping bag to add decorative swirls or borders.
More Recipes You’ll Adore
If you’re hooked on baking, here are some other recipes you’ll love:
Red Velvet Cheesecake
Ingredients
- Cheesecake Layer:
- 24 oz 3 blocks full-fat cream cheese, softened
- 3/4 cup granulated sugar
- 1/4 cup all-purpose flour
- 1/4 tsp salt
- 1/2 cup heavy cream
- 1 tsp vanilla extract
- 3 large eggs
- Red Velvet Cake Layers:
- 2 1/2 cups all-purpose flour
- 2 cups granulated sugar
- 1/4 cup unsweetened cocoa powder natural
- 1 tsp baking soda
- 1/2 tsp salt
- 2 large eggs
- 1 1/2 cups vegetable oil
- 1 cup buttermilk at room temperature
- 1 tbsp white vinegar
- 2 tsp vanilla extract
- 1 –2 tbsp red food coloring
- Cream Cheese Frosting:
- 16 oz 2 blocks cream cheese, softened
- 1/2 cup unsalted butter softened
- 4 cups powdered sugar
- 2 tsp vanilla extract
- Pinch of salt
Instructions
- Prepare the Cheesecake Layer:
- Preheat the oven to 325°F (165°C).
- Line a 9-inch springform pan with parchment paper and spray with non-stick spray.
- Beat cream cheese, sugar, flour, and salt until smooth.
- Add heavy cream and vanilla, followed by eggs, one at a time. Mix gently.
- Pour the batter into the pan and bake for 45–55 minutes, until set.
- Cool for 1 hour, then chill in the fridge for 3 hours or overnight.
- Make the Red Velvet Cake Layers:
- Preheat the oven to 350°F (175°C). Grease and line two 9-inch round cake pans with parchment paper.
- Sift flour, sugar, cocoa powder, baking soda, and salt in a bowl.
- In a separate bowl, mix eggs, oil, buttermilk, vinegar, vanilla, and red food coloring.
- Gradually mix the wet ingredients into the dry until smooth.
- Divide the batter evenly between pans and bake for 30–35 minutes.
- Cool in pans for 10 minutes, then transfer to wire racks to cool completely.
- Make the Cream Cheese Frosting:
- Beat softened butter and powdered sugar until smooth.
- Add softened cream cheese and vanilla; beat until creamy and lump-free.
- Assemble the Cake:
- Level the red velvet cake layers with a serrated knife.
- Place one red velvet layer on a platter, top with the cheesecake layer, and then the second cake layer.
- Frost the entire cake with cream cheese frosting.
- Decorate and Serve:
- Sprinkle with red velvet crumbs, shaved chocolate, or piped frosting swirls for decoration.
- Chill for at least 4 hours before serving.
Notes
- Make-Ahead: You can prepare the cheesecake layer up to 2 days in advance and freeze for 1 month.
- Storage: Store the assembled cake in the fridge for up to 5 days. Slices can also be frozen for up to 1 month.
- Shortcut: Use a store-bought red velvet cake mix if you’re short on time.
Final Thoughts on Red Velvet Cheesecake
This red velvet cheesecake isn’t just a dessert—it’s a masterpiece of flavor and texture that’s perfect for any occasion. Whether it’s a birthday, Valentine’s Day, or just a Tuesday night when you need some self-love, it’s worth every second spent making it.
Feeling inspired? Don’t stop here—dive into our other recipes like Hawaiian Pineapple Cake or the gooey, chocolatey perfection of Chocolate Lava Cake.
Happy baking—and even happier eating!